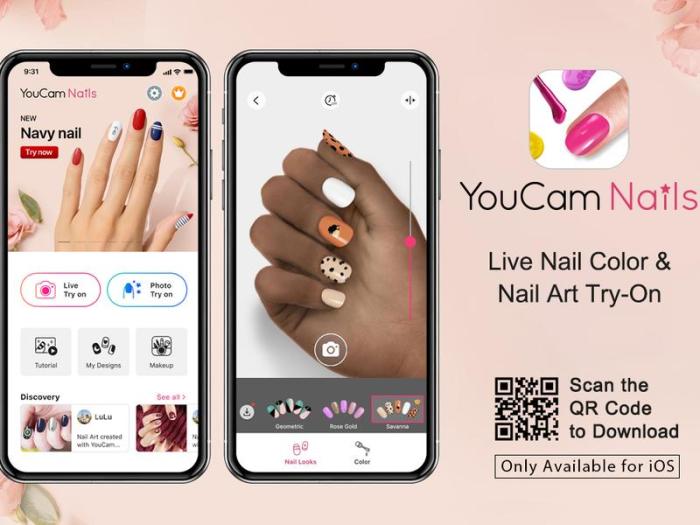
Nail Art Nirvana: Tools and Polishes for Perfect Manicures dives into the dazzling world of nail artistry, revealing the secrets to achieving stunning manicures. From the history of nail art to the latest trends, this guide equips you with the essential tools, polishes, and techniques to unleash your inner nail artist. Uncover the perfect blend of creativity and precision for a truly captivating nail experience.
This comprehensive exploration will cover everything from selecting the right tools and polishes to mastering various nail art techniques. Learn about different polish types, application methods, and drying times, ensuring a flawless finish. We’ll also delve into essential safety and hygiene practices to maintain both your nails and your tools. Get ready to transform your nails into wearable works of art!
Nail Art Nirvana: Tools and Polishes for Perfect Manicures
Nail art, a captivating fusion of creativity and meticulous technique, transcends the simple act of painting fingernails. It’s a form of self-expression, a canvas for imagination, and a way to subtly elevate any outfit. More than just pretty nails, nail art can be a powerful statement, a reflection of personality, and a way to celebrate individuality. From intricate designs to bold statements, nail art offers a diverse and dynamic realm of possibilities.
The “Nirvana” in Nail Art Nirvana signifies the ultimate state of nail artistry—a perfect harmony of aesthetics, technique, and a sense of fulfillment. It’s the point where the nail art truly embodies the artist’s vision, flawlessly executed and captivatingly beautiful. This is the feeling of achieving peak nail art, where the design, application, and overall effect are in perfect sync. This isn’t just about pretty nails, but the satisfying journey of creation, the careful precision of the technique, and the overall sense of accomplishment.
Defining Nail Art
Nail art encompasses a broad spectrum of designs and techniques applied to fingernails. It includes everything from simple manicures with color to elaborate designs incorporating rhinestones, glitter, decals, and even 3D elements. The key is the intentional artistry and the effort put into the final result. Nail art can be minimalist, bold, playful, or sophisticated, mirroring the diverse range of personal styles.
Historical Evolution of Nail Art
The history of nail art is as rich and varied as the designs themselves. While the practice of manicuring dates back centuries, the concept of intentional, artistic nail decoration has evolved significantly. Ancient civilizations adorned their nails with pigments and embellishments, signifying status and beauty. Throughout history, nail art has reflected the prevailing aesthetics and cultural trends of the time. Modern nail art draws inspiration from various sources, incorporating contemporary trends, artistic movements, and personal preferences.
Significance of Nail Art in Modern Culture
Nail art has become a significant aspect of modern culture, transcending its traditional role as a mere aesthetic practice. It reflects a growing emphasis on self-expression, creativity, and personal style. Nail art allows individuals to showcase their unique personalities and celebrate their individuality through vibrant designs and intricate patterns. Its presence in social media and popular culture further cements its significance as a form of visual communication and self-promotion.
Essential Tools for Nail Art Nirvana
Nail art requires a diverse array of tools, each playing a specific role in achieving the desired aesthetic. Understanding the purpose and application of these tools is crucial for mastering the craft.
| Tool Type | Description | Purpose | Example |
|---|---|---|---|
| Manicure Tools | Includes nail clippers, files, buffers, and cuticle pushers. | Preparing the nails for nail art application by shaping, trimming, and cleaning. | Nail clippers, emery boards, cuticle nippers |
| Nail Polish | A wide range of colors, finishes, and textures for creating color schemes. | Providing color and finish to the nails. | Acrylic nail polishes, gel polishes, glitter polishes |
| Decorative Elements | Includes rhinestones, glitter, decals, and other embellishments. | Adding visual interest and unique elements to nail designs. | Rhinestones, glitter, nail stickers, acrylic powders |
| Brushes | Varying sizes and shapes for precise application of polish and embellishments. | Applying polish, creating intricate patterns, and detailing designs. | Fine detail brushes, angled brushes, round brushes |
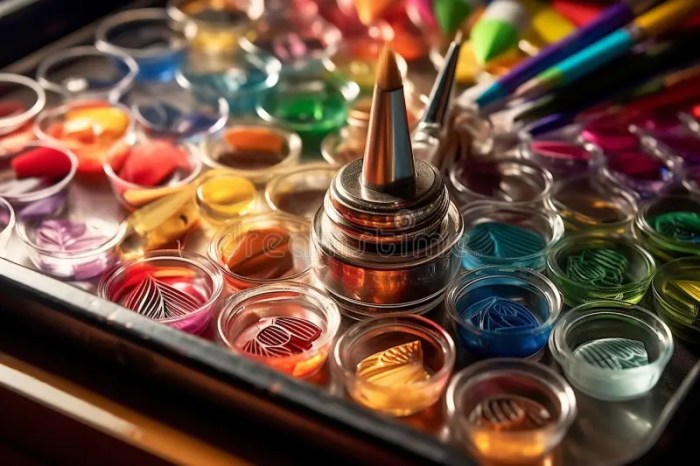
Essential Tools for Nail Art

Source: nirvananailtyler.com
Nail art is more than just pretty designs; it’s a creative outlet that demands the right tools. From intricate patterns to bold statements, the quality of your tools directly impacts the outcome. Choosing the right ones can transform a simple manicure into a masterpiece. This section will delve into the essential tools for nail art, exploring their types, materials, and importance.
Types of Nail Art Tools
Nail art tools come in a wide variety of shapes, sizes, and materials. This diversity allows for precise application, intricate details, and a wide array of design possibilities. From basic brushes to specialized applicators, each tool caters to a specific need in the nail art process. Understanding these tools is key to unlocking your creative potential.
Material Comparison
The material of a tool significantly affects its performance. Metal tools, often made of stainless steel, offer precision and durability. They are excellent for creating sharp lines and intricate details. However, they can sometimes be more challenging to handle for beginners due to their firmness. Acrylic tools, on the other hand, are lightweight and flexible, allowing for greater control and maneuverability, especially beneficial for beginners. They’re also a good option for intricate designs, but they may not be as durable as metal tools. Choosing the right material depends on your individual skill level and desired outcomes.
Importance of Quality Tools
Investing in quality nail art tools is a worthwhile investment for any aspiring nail artist. High-quality tools are designed for precision, ensuring even application of polish, clean lines, and lasting results. A good tool can save time, reduce frustration, and elevate the overall quality of your nail art. They allow for more accurate designs and reduce the need for multiple attempts. Ultimately, a well-equipped toolkit is essential for achieving perfect manicures.
Tool Overview
| Tool | Material | Features | Use Cases |
|---|---|---|---|
| Nail Art Brush | Acrylic or Metal | Various sizes and shapes; fine tips for details | Applying nail polish, creating patterns, intricate designs |
| Dotting Tool | Metal or Acrylic | Small, round tips for precise dots and accents | Creating polka dots, embellishments, and small details |
| Manicure Scissors | Stainless Steel | Sharp, precise blades for trimming and shaping | Preparing nails for nail art, shaping free edges |
| Nail Art Stencils | Plastic or Paper | Various shapes and designs for creating consistent patterns | Creating repeating patterns, geometric designs, masking areas |
| Tweezers | Metal | Fine tips for precise placement of embellishments | Applying rhinestones, glitter, and other embellishments |
| Nail Art Spatula | Plastic or Metal | For mixing nail polish colors and applying adhesives | Preparing and applying nail art adhesives, mixing colors |
Nail Polish Selection and Application
Source: cosmeticsbusiness.com
Nail polish, the ultimate accessory for your fingertips, comes in a dazzling array of colors and finishes. Beyond the vibrant hues, understanding the different types and their application methods is key to achieving those perfect, salon-worthy manicures at home. This guide dives deep into the world of nail polishes, equipping you with the knowledge to choose the right polish for your desired nail art and application style.
Choosing the right nail polish is a crucial step in achieving your desired nail art look. Different types of polishes cater to specific needs and styles, and understanding their properties is essential for a successful manicure. From classic lacquers to innovative gels and acrylics, this section explores the various options available and how to apply them effectively.
Types of Nail Polishes
Nail polishes come in diverse forms, each with unique characteristics that affect application and longevity. Regular nail lacquer, gel polish, and acrylic nail polish are the most common types. Understanding their differences is vital for choosing the right product for your needs.
- Regular Nail Lacquer: This classic option is known for its ease of application and affordability. It typically requires a top coat for durability and shine. Regular nail lacquer dries relatively quickly, making it a good choice for quick manicures. It’s the go-to for everyday wear.
- Gel Polish: Gel polishes offer superior durability and a high-gloss finish, lasting for several weeks. They are applied in a thin layer and cured under a UV or LED lamp, which sets the polish firmly. The curing process is essential for achieving the gel polish’s long-lasting qualities. A dedicated gel polish application kit, including the curing lamp, is needed for best results.
- Acrylic Nail Polish: Acrylic nail polish is a mixture of liquid and powder that is applied to create a sculpted nail enhancement. This process creates a strong, durable, and aesthetically pleasing nail that lasts longer than other types of nail polish. It is more often used for elaborate nail art and extends the natural nail.
Nail Polish Application Techniques
Proper application techniques are key to achieving the desired nail art look. Different nail art styles demand specific application strategies.
- Classic Manicure: For a classic manicure, apply a thin, even coat of polish to each nail. Ensure each coat is completely dry before applying the next. Avoid applying too much polish at once, as it can lead to unevenness. A final top coat adds shine and protects the polish.
- French Manicure: Apply a base coat to prepare the nails. Paint the tips of the nails with a white or light shade of polish. Use a fine-tipped brush to achieve precise lines. A clear top coat seals the design and enhances its elegance. The white tip is the defining characteristic of this manicure.
- Gradient Manicure: Create a smooth gradient effect by applying different shades of polish to the nails. Begin with a base shade and progressively add a lighter or darker shade to create a blended effect. This method showcases creativity and provides a stunning finish. This style offers versatility and a touch of artistry.
Essential Nail Polish Shades
The selection of nail polish shades can greatly influence the overall nail art design. Consider these essential shades for different nail art ideas.
- Neutral Shades (Nude, Beige, Pink): These are perfect base shades for various nail art designs and complement a wide range of nail styles.
- Bold Colors (Red, Blue, Green): Bold colors create a striking statement and are excellent for highlighting any nail art design. The vivid shades add personality and can be used as accents or as the main color.
- Metallic Shades (Gold, Silver, Copper): These shades add a touch of glamour and elegance to any manicure. They are excellent for creating a sophisticated look or as accents in nail art designs. These colors add a touch of extravagance and sparkle.
Polish Type Comparison
| Polish Type | Application Method | Drying Time | Finishing Effects |
|---|---|---|---|
| Regular Nail Lacquer | Brush application, thin coats | Few minutes | Shine, smooth finish, typically requires top coat for durability |
| Gel Polish | Brush application, thin coats, curing under UV/LED lamp | Minutes under lamp | High shine, high durability, long-lasting finish (weeks) |
| Acrylic Nail Polish | Application using a brush, mixture of liquid and powder, shaping | Variable | Strong, durable, sculpted look, requires shaping |
Nail Art Techniques and Styles
Unleash your inner artist with a dazzling array of nail art techniques! From subtle elegance to vibrant masterpieces, these methods transform your nails into wearable works of art. Explore the diverse world of nail art, and discover the joy of creating personalized looks that reflect your unique style.
Nail Art Techniques
Nail art techniques range from simple to sophisticated, each offering a unique way to express creativity. Mastering these techniques unlocks a world of possibilities for designing beautiful manicures. Learning the basics of each technique will allow you to explore your artistic flair and create stunning designs.
- Nail Art Painting: This classic technique involves using nail polish to create intricate designs, patterns, and illustrations directly on the nail. Different brush sizes and techniques are crucial for creating varied effects, from fine details to bold strokes. Practice makes perfect, so don’t be discouraged by initial imperfections. The key is consistent practice and experimentation.
- Nail Art Stamping: A popular and efficient technique, nail art stamping utilizes pre-designed images or patterns that are transferred onto the nails using a special stamping plate and a scraper. This method is ideal for achieving intricate details quickly and consistently, making it a favorite among nail artists and enthusiasts.
- Nail Art Decals: Decals are pre-cut adhesive sheets with various designs. Applying them to the nails is simple, creating eye-catching patterns and styles with minimal effort. The variety of designs available in decals allows for quick and easy nail art creation.
Step-by-Step Procedures
Understanding the step-by-step procedures for each technique is essential for achieving professional-looking results. Precise application and attention to detail are crucial for creating polished designs.
- Painting: Start with a clean, prepped nail. Apply a base coat for protection and even coverage. Next, select your desired nail polish colors and brush sizes. Practice your strokes and techniques, starting with simple lines and shapes. Add layers to create depth and dimension, and finish with a top coat for durability and shine. Don’t be afraid to experiment with different brush strokes, angles, and techniques.
- Stamping: Prepare the nails by applying a base coat and a thin layer of nail polish. Carefully position the stamping plate with the design facing down. Use a scraper to remove excess polish and transfer the design to your nail. Apply a top coat for protection and shine. Consistency is key in nail stamping.
- Decals: Prepare the nails by applying a base coat and a thin layer of nail polish. Carefully remove the decal from the sheet and position it on the nail. Gently press down to adhere the decal. Apply a top coat to protect and secure the decal. Using a small amount of nail glue can enhance adhesion for a more polished look.
Popular Nail Art Styles
Nail art styles reflect current trends and personal preferences. Explore various options and find the ones that resonate with your personality and aesthetic.
- Minimalist: This style features clean lines, neutral colors, and simple designs. It’s a classic choice for a chic and understated look. Minimalist designs emphasize the natural beauty of the nails.
- Floral: Floral nail art incorporates delicate flower patterns and colors. This style adds a touch of femininity and elegance. Floral designs can range from simple blossoms to intricate arrangements.
- Geometric: Geometric nail art features sharp lines, angles, and shapes. This style creates a bold and modern aesthetic. Geometric designs offer a way to add a modern and sophisticated touch to nail art.
Tools for Each Technique
The right tools are essential for achieving the desired results. Proper selection and usage enhance your creative process.
| Technique | Tools Required | Steps Involved | Visual Examples |
|---|---|---|---|
| Painting | Nail polish, brushes (various sizes), base coat, top coat | Prep nails, apply base coat, paint designs, apply top coat | (Imagine a variety of painted nail art designs, showcasing different styles like stripes, dots, and flowers) |
| Stamping | Nail polish, stamping plate, scraper, base coat, top coat | Prep nails, apply polish, stamp design, apply top coat | (Imagine a series of nails showcasing intricate stamped designs, such as patterns, flowers, and animals) |
| Decals | Decals, base coat, top coat, tweezers (optional) | Prep nails, apply base coat, apply decal, apply top coat | (Imagine nails with various decal designs, from simple stripes to intricate floral arrangements) |
Maintaining Nail Art: Nail Art Nirvana: Tools And Polishes For Perfect Manicures
Keeping your stunning nail art looking fresh and fabulous is key to maximizing its impact. Proper maintenance extends the life of your masterpiece and prevents damage to your natural nails. From gentle removal techniques to proactive prevention strategies, we’ve got you covered.
Nail art, while beautiful, requires extra care to ensure its longevity and protect your nails. Following these guidelines will help maintain the aesthetic appeal and overall health of your nails. By understanding the potential pitfalls and implementing preventative measures, you can enjoy your nail art for longer.
Extending the Life of Nail Art
To keep your nail art looking its best, regular touch-ups and mindful handling are essential. Avoid harsh chemicals or abrasive materials that could damage the polish or the nail plate. Gentle cleaning and proper nail care habits are crucial. Using a top coat can also significantly extend the life of your nail art.
Maintaining the Condition of Nail Art
Maintaining the pristine condition of your nail art involves a combination of daily habits and occasional interventions. A gentle, soft-bristled brush and a specialized nail art cleaner can help remove dust and debris without affecting the design. Avoid excessive exposure to water and harsh cleaning agents. Remember to moisturize your nails and cuticles regularly.
Appropriate Ways to Remove Nail Art
The correct removal method prevents damage to your natural nails. Using a non-acetone nail polish remover is preferable. Soak a cotton ball in the remover and gently apply it to the nail art. Avoid harsh scrubbing or pulling, which could lead to damage. For intricate designs, you may need to use a cuticle pusher to carefully lift the polish without harming the surrounding nail.
Preventing Damage to Nails After Nail Art Application
Taking precautions after applying nail art can prevent damage to your natural nails. Avoid picking or biting at your nails, which can easily lift the polish and damage the nail plate. Avoid harsh cleaning products or materials that might scratch or weaken your nails. Choose a quality nail polish and top coat to ensure long-lasting results and a smooth finish.
Troubleshooting Nail Art Issues
| Problem | Cause | Solution | Prevention |
|---|---|---|---|
| Chipped Polish | Exposure to moisture, physical impact, or improper application | Use a small brush to carefully touch up the chipped area. Apply a top coat to seal the repair. | Avoid excessive hand washing, use gloves when handling harsh chemicals, and ensure proper application techniques. |
| Lifting Polish | Improper curing, insufficient top coat, or inadequate preparation | Use a cuticle pusher to carefully lift the polish without harming the surrounding nail. Apply a top coat to seal the repair. | Ensure proper curing time for the nail polish, apply a thick layer of top coat, and thoroughly prep your nails before application. |
| Uneven Polish | Inconsistent application or improper use of tools | Use a brush to carefully apply additional layers of polish in the uneven areas, making sure the polish is smooth and even. | Use a consistent, controlled application method. Apply the polish in thin layers. |
| Damaged Nail Plate | Harsh removal methods, excessive force, or improper nail care | Consult a professional for repair and maintenance. If possible, try applying a strengthening nail treatment. | Avoid harsh removal methods. Use a non-acetone remover and gentle scrubbing techniques. Prioritize proper nail care. |
Inspiration and Trends
Nail art is a constantly evolving world of creativity and self-expression. From subtle elegance to bold statements, trends shift and inspire us to explore new designs and techniques. Staying updated on the latest trends allows you to create truly unique and personalized looks, making your manicures a reflection of your individual style.
This section will delve into current nail art trends, popular designs, and how to find inspiration to create your own stunning masterpieces. We’ll explore various methods for discovering your personal style and how to incorporate trending designs into your nail art practice.
Current Nail Art Trends
Nail art trends are influenced by broader cultural and aesthetic movements. From minimalist aesthetics to intricate patterns, the options are endless. Understanding the current trends helps you create manicures that align with your personal style and preferences.
Popular Nail Art Designs
Numerous nail art designs are popular right now. Some of the most sought-after designs include:
- Abstract Art: Abstract designs often feature flowing lines, geometric shapes, and color gradients. This style allows for a lot of creative freedom, and the possibilities are truly endless. You can play with different color palettes, textures, and patterns to create a truly unique and personalized look.
- Geometric Nail Art: This style focuses on precise lines and shapes, often creating a clean and modern look. Popular geometric shapes include triangles, squares, and circles, which can be combined to create visually stunning patterns.
- Metallic Nail Art: Metallic nail art involves using nail polishes with a shimmering or metallic finish. These designs often feature foil, glitter, or other reflective elements, which create a glamorous and eye-catching look. This trend is often popular for special occasions or when a touch of sparkle is desired.
- Floral Nail Art: Floral nail art features intricate designs of flowers and botanical elements. This design is often created with detailed hand-painting techniques and provides a romantic and feminine aesthetic. The style can be further enhanced with the use of different colors and textures to add depth to the design.
Choosing Nail Art Designs Based on Personal Preferences
Consider your personal style and the occasion when choosing a nail art design. If you prefer a minimalist aesthetic, consider simple designs with neutral colors. For a more vibrant look, opt for bold colors and intricate patterns. Consider the occasion: a simple design might be perfect for everyday wear, while a more elaborate design could be suitable for a special event. Experiment with different designs and find what resonates with you.
Finding Inspiration for Nail Art
There are many avenues to explore when searching for nail art inspiration. Social media platforms, like Instagram and Pinterest, are excellent resources for discovering new ideas and techniques. Browsing through art galleries and exhibitions can also spark creative ideas. Looking at other forms of art, like paintings, sculptures, and even architecture, can provide inspiration for new nail art designs.
Examples of Popular Nail Art Styles, Nail Art Nirvana: Tools and Polishes for Perfect Manicures
- “Ombre” Nail Art: This style involves transitioning from one color to another in a smooth gradient. This can be achieved with a variety of colors, from pastels to bolder hues. The gradient effect creates a subtle but sophisticated look, and it can be adapted to suit various styles and occasions.
- “Watercolor” Nail Art: This style involves creating a soft, painterly effect using watercolor techniques. This effect adds a unique and artistic touch to the nails, allowing for a variety of color combinations and artistic expressions.
- “Negative Space” Nail Art: This style uses negative space, leaving areas of the nail unpainted. This technique is perfect for creating a sense of elegance and simplicity. It often features intricate shapes and designs, showcasing the beauty of the empty space. Negative space nail art is perfect for those who want a minimal but still impactful design.
Safety and Hygiene
Source: dreamstime.com
Level up your nail game with the right tools and polishes, finding your nail art nirvana! But, while you’re crafting those perfect manicures, think about the bigger picture – sustainable fashion choices are crucial, too. Check out How to Build a Sustainable Wardrobe: Eco-Friendly Fashion Finds for tips on eco-friendly fashion finds. Ultimately, choosing sustainable options for your wardrobe and your nail art supplies is a win-win for both style and the planet, making your nail art experience even more satisfying.
Protecting your nails and your health during the nail art process is crucial. From choosing the right tools to maintaining proper hygiene, these practices are not just about looking good, but feeling good too. Ignoring safety and hygiene can lead to painful infections or long-term health issues. A well-maintained workspace and mindful practices are essential for a safe and enjoyable nail art experience.
Importance of Safety Precautions
Nail art can be a beautiful and creative endeavor, but it’s essential to prioritize safety. Accidents can happen if proper precautions aren’t taken. Sharp tools, potent chemicals, and potential cross-contamination all pose risks that can be mitigated with careful attention to detail. Using protective gear like gloves and eye shields can prevent injuries and infections. Creating a well-lit workspace and using tools with ergonomic designs reduces the risk of strain or repetitive motion injuries.
Proper Hygiene Practices for Tools and Surfaces
Maintaining a clean and sterile environment is paramount in nail art. Proper hygiene prevents the spread of bacteria and fungi, which can lead to infections. Tools should be disinfected after each use to eliminate any potential pathogens. Work surfaces should be sanitized regularly to avoid contamination. Proper disposal of used materials is crucial to prevent cross-contamination.
Risks of Using Unhygienic Tools
Using unhygienic tools can lead to various health problems. Contaminated tools can introduce harmful bacteria and fungi into the nail area, potentially causing infections like paronychia (inflammation of the skin around the nail). This can lead to pain, swelling, and even pus formation. Additionally, some infections can spread to other parts of the body. Unhygienic practices can also increase the risk of allergic reactions to certain materials.
Importance of Quality Products and Avoiding Harmful Chemicals
Choosing high-quality, reputable products is vital for safety and effectiveness. Using low-quality products or those containing harmful chemicals can cause skin irritation, allergic reactions, or long-term health problems. Look for products with clear ingredient lists and certifications from reputable organizations. Always follow the manufacturer’s instructions carefully. Avoiding harsh chemicals and opting for natural or hypoallergenic alternatives is also crucial for a healthier nail experience.
Safety Tips for Nail Art
| Safety Tip | Description | Impact | Example |
|---|---|---|---|
| Use protective gear | Wear gloves, eye protection, and a mask when necessary. | Reduces risk of infection, chemical exposure, and injury. | Wearing gloves while handling nail polish remover. |
| Proper tool disinfection | Sterilize tools after each use to kill bacteria and fungi. | Prevents infections and cross-contamination. | Using an autoclave or a proper disinfectant solution to clean tools. |
| Regular surface sanitation | Clean and disinfect work surfaces regularly to prevent buildup of germs. | Reduces the risk of spreading infections. | Cleaning the workspace with antibacterial wipes or a disinfectant solution between clients. |
| Choose quality products | Select nail art products from reputable brands with clear ingredient lists. | Reduces risk of skin irritation, allergic reactions, and long-term health problems. | Using nail polish from a trusted brand with a detailed ingredient list. |
Nail Art for Special Occasions
From casual brunch dates to dazzling galas, your nails are a silent statement reflecting your inner sparkle. Nail art isn’t just about aesthetics; it’s about expressing your personality and amplifying your look for special occasions. Let’s explore how to transform your nails into mini masterpieces for every event.
Nail art elevates your look, adding a touch of personal flair to any special occasion. Choosing the right design can significantly enhance your overall style, making a subtle yet powerful statement. Whether it’s a wedding, a birthday bash, or a sophisticated soirée, the perfect nail art can elevate your ensemble and leave a lasting impression.
Nail Art Ideas for Weddings
For a wedding, subtle elegance is key. Consider designs that complement the overall theme and dress code. Delicate floral motifs, elegant French manicures with subtle embellishments, or minimalist designs with a touch of sparkle can work wonders. Avoid anything too bold or flashy.
Nail Art Ideas for Parties
Parties offer more leeway for creativity. Bright colors, intricate patterns, and bold embellishments can add a fun and festive touch. Consider incorporating the party’s theme into your nail design, like geometric patterns for a modern party or shimmering accents for a glamorous soirée.
Nail Art Ideas for Birthdays
Birthdays are about celebrating the birthday person’s personality. Personalized designs with their initials, birthstones, or special symbols can make a unique and memorable touch. If the birthday person has a favorite color, incorporating it into the nail art design will be a thoughtful gesture. Consider age-appropriate themes, like playful animals for a younger birthday or sophisticated florals for an adult celebration.
Nail Art Ideas for Proms
Proms call for sophistication and elegance. Consider designs that are glamorous and eye-catching. Shimmering metallics, intricate floral patterns, or carefully placed rhinestones can make a statement without being overly ostentatious. Avoid overly bold or distracting patterns that might detract from the overall look.
Choosing the Right Nail Art for Special Occasions
The key to choosing the right nail art is considering the occasion’s theme and your personal style. A wedding demands a more classic and understated design, while a birthday party can embrace more playful and vibrant choices. Understanding the event’s dress code and atmosphere will guide your design decisions. Think about the overall aesthetic and how your nail art can complement it.
Examples of Appropriate Nail Art Designs
| Occasion | Suggested Design | Color Palette | Special Considerations |
|---|---|---|---|
| Wedding | Delicate floral accents on a neutral base | Pastels, creams, nudes | Avoid overly bold colors or patterns |
| Birthday Party | Personalized design with birthstone or initial | Birthday person’s favorite colors | Playful and vibrant colors for a younger person |
| Prom | Metallic shimmers with rhinestones | Silvers, golds, or deep jewel tones | Ensure the design complements the overall dress code |
| Sophisticated Soirée | Geometric patterns in black and gold | Deep jewel tones, black, gold | Maintain elegance and sophistication |
Closure
In conclusion, Nail Art Nirvana: Tools and Polishes for Perfect Manicures offers a complete guide to navigating the exciting world of nail art. From understanding the history and significance of nail art to mastering various techniques and styles, you’ll gain the knowledge and inspiration to create stunning manicures. Embrace the beauty and creativity of nail art, and discover the tools and techniques to elevate your nail game to new heights. Remember to prioritize safety and hygiene throughout the process, for a truly enjoyable and rewarding experience.